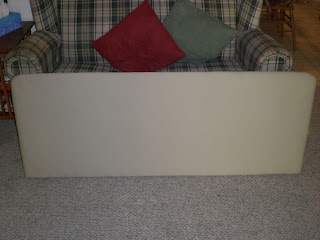
Here is what our headboard used to look like:
I found it at a garage sale for $5.00. It is hard wood and matched the color of the dresser we were currently using. We have never had a matching bedroom suite. A couple of things my dad had made me and then some hand me downs or garage sale finds.
We couldn't get it to attach correctly to our bed rails, so Josh just screwed it into the wall. Hence the screws on the bottom. This piece would not match the furniture that my dad refurbished for us so we needed to buy a new headboard or transform this baby somehow. So I started searching through DIY blog sights and educated myself on how to reupholster a headboard. I then dug through my material stash in the attic and praise God I had some khaki material that matched our duvet cover perfectly! I was super excited!
Next I cut off the legs and covered it with an egg carton mattress pad that we had bought at Dollar General a few months back. It was like $3.00 with a coupon and we did not have a need for it on the bed anymore. Oh, and in case you are wondering, I did NOT use a power tool on this. I decided to use the good old hand saw to cut those legs off. I'm just beginning my DIY journey and am not quite ready to dive into the 'power tool stage' yet. I love my appendages too much!
Not sure if you noticed in the original picture of the headboard, but there was a 'pocket' in the middle. I just doubled up on the mattress pad there so that it would not show through. I stapled the hound out of it to make sure that the padding would not be going anywhere!
Then it was time for the material. I washed and ironed it with heavy starch twice. That way I would be sure to get all the wrinkles out. I stretched it out and stapled it at 12:00, 3:00, 6:00, and 9:00 o'clock. Then I did the corners and finished the sides. Here is a look at the completed back.
I love the fact that if I want to change the material to a new design or just wash it, I can remove it without disturbing the padding.
So here is the finished headboard!
I love the simplicity of it and it is nice and soft to lean against for when I want to sit up in bed and read. I love to read in bed!!
On the back we attached these hooks for easy hanging and removal for when I need to clean it.
And here it is.... (drum roll please)
 |
| L O V E!!! |


Great job again!!! Good for you... and with FOUR little ones "helping" you? Wow, wow, wow!!! Can't wait to see more. Those throw pillows are super cute!
ReplyDeleteIt looks grrreat! And I can't wait to see the rest of the room!
ReplyDeleteyou are really getting into this blogging and DIY thing! :) good for you! Love the upholstered headboard - you did a great job. Think I need to come visit and see the finished bedroom in person. ;)
ReplyDeleteYou are really talented!
ReplyDelete